
[sws_divider_small_padding]
Mark inside of canister to indicate which side of truck it goes on. This one is for the passenger side.

[sws_divider_small_padding]
Layout on inside of canister where exterior mounting saddle is located for drilling purposes

[sws_divider_small_padding]
Measure from top of canister down to where each strap is located.

[sws_divider_small_padding]
Mark these measurements on INSIDE of canister measuring from top lip.


[sws_divider_small_padding]
With a small 3/16” drill bit, drill the marked holes inside the can through saddle and all – (note we use a small air line on our bit to protect the cowling and prevent the bit from going too deep)

[sws_divider_small_padding]
Once all pilot holes are drilled, remove canister and straps


[sws_divider_small_padding]
Ream holes in canister out to 3/8” or 1/2” your choice

[sws_divider_small_padding]
Ream holes in saddle bracket on truck to match canister
[sws_divider_small_padding]
We roll a peice of 1/8” smooth aluminum 8″x10” to fit the radius of the canister on the inside


[sws_divider_small_padding]
Aluminum should fit like this inside the canister; this acts as a big washer and prevents the bolts from pulling through the thin can

[sws_divider_small_padding]
Mark aluminum positioning for future reference
[sws_divider_small_padding]
Holding aluminum in place inside the can, mark holes through can onto aluminum


[sws_divider_small_padding]
Drill marked holes in aluminum to match can and saddle

[sws_divider_small_padding]
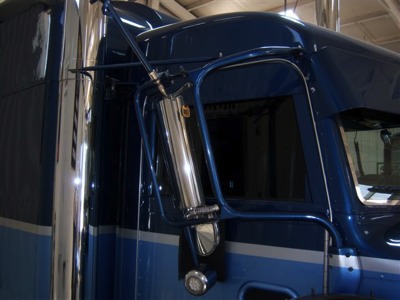
Re-assemble, fold mirror bracket back and tighten, wipe it off, stand back and admire your work!!!!
[sws_divider_top]